Lost Wallet Protector
American Express | Mobile App Design
MY ROLE: UX DESIGN & UI DESIGN
American Express needed a design of the mobile app for their existing product - Lost Wallet Protector. I’ll take you through the process I used to design this product.

The Challenge
The Lost Wallet Protector (LWP) is a service that allows users to manage and protect their credit cards, cell phones, passports, driver’s license, and other important documents in the event of a loss. The goal of the mobile app design was to create a primary tool, existing American Express customers would use to enroll and manage their LWP account. Customer would be able to use all product features on the go, without a need to be near computer in the event they had to report one of their documents as lost, or simply wanted to manage their account.
LWP mobile app is secure with password protected feature. Once logged in, it enables customers to take pictures of any documents which they want to store for later viewing. The information can be tagged and organized by the user. The app allows users to report a credit card, cell phone or other document “lost” and starts the back-end cancellation process. A “click to call” feature allows users to speak with a live agent immediately.
In addition to mobile app, I had to redesign the existing LWP website and a Customer Support Tool, which I’ll take you through in a separate case study.
Mobile App Design Process
Tools used:
- Post-it notes for information architecture
- Paper to sketch wireframes
- Photoshop to design high-fidelity mockups
After gathering all the requirements and clearly understanding the problem that needs to be solved with the new product, I began researching the back-end technology that would be used to build the mobile app, as well as the user goals that need to be addressed. In the process, I’ve used post-it notes to organize information architecture, sketch wireframes for user flows and design modern and aesthetically pleasing user interface for every screen within mobile application.
Define Easy Registration Flow Process
Goal
Create registration flow with minimal number of steps even though a lot of information is required from the customer.
Solution
I’ve broken down registration flow into 3 steps. First step, user had to provide information to create account such as name, email address and password. Second step collected necessary personal information, and third step required user to answer some identity verification questions. Upon successful account setup, user was take to the dashboard screen of the LWP mobile app.
WELCOME SCREEN

STEP 1

STEP 2

STEP 3

Mobile App Dashboard Design
Goal
Design a mobile app dashboard that will provide user an easy access to manage their documents which they want to keep secure in the LWP app.
Solution
I decided to go with modular approach and designed dashboard using main six document categories available in the app. Each category is presented with an icon and shows the quantity of items user has in the category. Each icon is clickable and takes user to the list of items in the category for user to manage. In addition, as a line item I’ve added a “Notifications” category which appears in case there is one or more alert.

Quick Way to Add Documents
Using Phone’s Camera
ADDING CREDIT CARD
Goal
Allow customers to add new credit cards using Card.io that allows phone’s camera to scan credit cards. The technology uses Optical Character Recognition to decode the card numbers and automatically populate required fields to store card in the LWP.
Solution
On the main dashboard of the LWP mobile application, in the bottom main navigation, I’ve added a camera button which provides an easy access for customer to take photo of the credit card they wish to store. When user clicks on the camera icon, they are presented with the list of items to choose from in UI Picker, one of them being “Credit card”. After selecting “credit card”, next screen turns on phone’s camera with view window where credit card needs to be placed. The software will automatically scan the card and present detected information on the next screen. In event if automatic scanning of the card can’t detect necessary information, following screen will display fields that are required for successful completion of the process.

STEP 1

STEP 2

STEP 3

STEP 4

ADDING DRIVER'S LICENSE
STEP 1

STEP 3
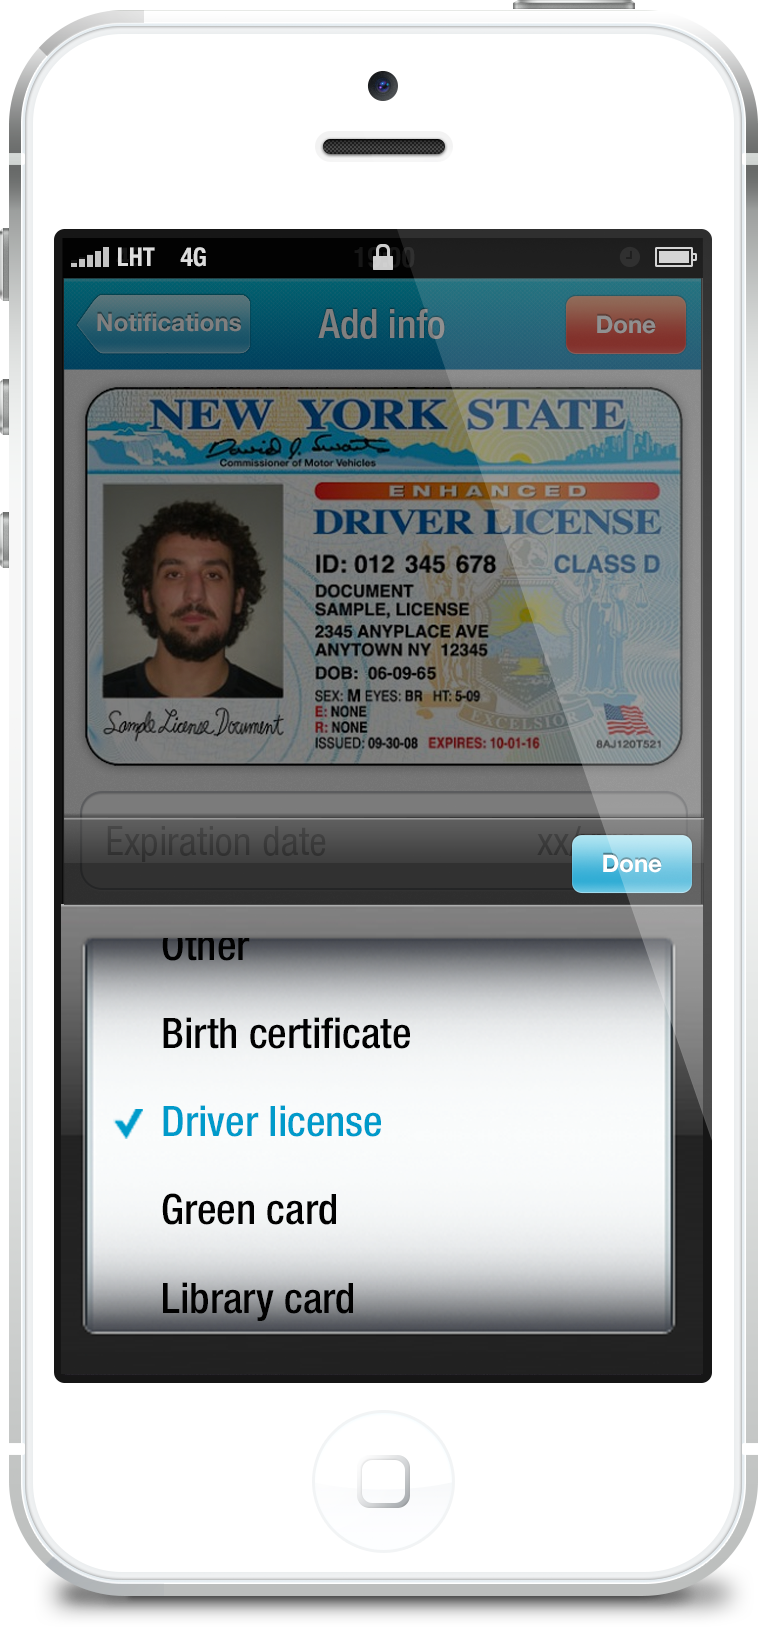
STEP 2

STEP 4

On the main dashboard of the LWP mobile application, I’ve added a camera button which provides an easy access for customer to take photo of their driver’s license. When user clicks on the camera icon, they are presented with the list of items to choose from, one of the being “Identification”. Once selected, next screen turns on phone’s camera and presents large “camera” button to take photo of the driver’s license. After capturing the image, following screen will ask for a type of ID. In this case, user will select “Driver’s License”. Next, user must type in Driver’s License State, Number and Expiration date. After successful set up, user will now see a “Report lost driver’s license” button on the page with stored Driver’s License, which user can press if such event occurred.
STEP 5

Adding Vehicle Information
On the main dashboard, user can select “Add” icon, then choose “Other document” from the list of options. Next, they are presented with a list of available document types to choose from, and click on “Vehicle”. “Add Vehicle Info” form is presented and asks for necessary fields to be filled out to complete the task.
STEP 1
STEP 2
STEP 3
STEP 4


Simple Way to Report Lost Card
For every credit card stored in the LWP account, user will see a “Report Lost Card” button which can be used to report card. User is given two options – one is to “Submit Lost Card” electronically and second is to “Call Support Team” where customer is automatically connected to customer support representative for further assistance. After reporting card lost, the user will now see a note with the date when they reported the card as lost for their reference. In event when user changed their credit card number or needs to make security code or expiration date updated to the card, they can click on “Edit” button to perform those tasks.
STEP 1
STEP 2
STEP 3
STEP 4


Adding Emergency Contact
The goal is to allow customers to add information for one or multiple emergency contacts. Information under this category will be used by Customer Support team in case of emergency to help customer reach important people on their list. On the main dashboard, user can select “Add” icon in bottom main navigation, then choose “Emergency contact” from the list of options. Next, they are presented with a “Add emergency contact” form with necessary fields to fill out to complete the task.


